
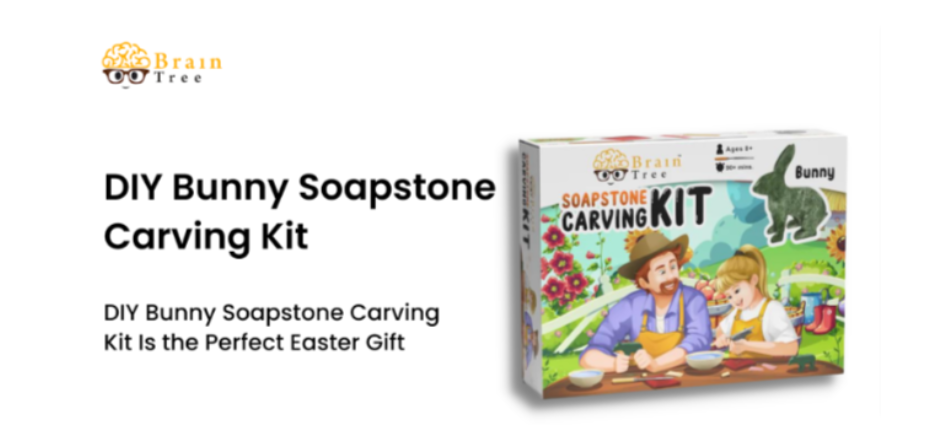
The ideal Christmas Gift is this DIY Kit for Carving a Bunny out of Soapstone
If you're looking for a unique way to give a "crafted gift" for Christmas, this DIY Bunny Soapstone Carving Kit is a terrific option (and one that your lucky recipient might not even expect).
It's guaranteed to be a favorite at any Christmas party or event, and it also makes a great homemade Christmas present.
This DIY rabbit soapstone carving kit is ideal for creating a charming, personalized gift for your friends and family over the holiday season. Follow these four simple steps to create your own cute bunny figurine!
Tools to Use
This DIY bunny soapstone carving kit is made up of two main parts: the tools and the stone. You'll need these to complete your project.
Our Soapstone box contains everything you need to carve and create a masterpiece : Precut and Semi Shape Soapstone. A Carving file that is safe for kids. Different types of Sandpaper use environmentally friendly wax to polish. A Soft Cloth to make the stone smooth and shiny And Step by step carving intrusion manual which is very useful
Before you begin carving, make sure to read through the instructions that came with your soapstone carving kit so that you can get an idea of what to expect before starting work on your project.
There are many different ways of carving soapstone (or any material, for that matter), but here are some basic steps you can take:
Soapstone carving kit
Soapstone is a soft stone that is easy to carve. It's also called steatite, and it's a metamorphic rock. Soapstone has been used in sculpture and carving for thousands of years because its softness makes it ideal for artists who want to create detailed drawings or sculptures.
You can find soapstone at art supply stores or online vendors like Amazon—and if you're lucky enough to have access to actual soapstone, you'll be able to turn your homemade bunny into an actual statue!
Sandpaper
It's important to use fine-grit sandpaper. We recommend using a sandpaper block, but you can also use a sanding sponge or even your own fingers if you want.
Depending on the size of your soapstone and how smooth you want it to be, you may have to do this step multiple times in order for it to become as smooth as possible.
Step 1:
First, you'll want to draw your design on the soapstone with a pencil. Use a ruler to make straight lines, and use a compass to make circles and angles. I used the smallest circle cutter in my kit—about 1/2" in diameter—and cut out two circles from my soapstone slab: one for the bunny's face and one for its body.Next, you'll want to trace your design onto parchment paper using an erasable marker so that you can see it clearly as you work. You could also use regular paper if you prefer not to work with parchment paper or need more room for error!
Draw your design with a pencil.
- Draw your design with a pencil. Before you start carving, you need to draw your design on the stone. You can use any pencil, but we recommend using a mechanical pencil because they make it easier to get a fine line.
- Make sure the design is clean and clear before you start carving. Once you've drawn your design onto the soapstone, look at it from different angles to make sure that everything looks good from every angle and that there aren't any lines or pieces missing in places where they shouldn't be (like between two legs). If something looks wrong, erase it with a dry cloth or eraser until it looks right again!
- Use a ruler if necessary for straight lines. If there are any straight lines in your drawing, like between two legs or arms of an animal figure like this bunny drawing below by artist Christina Reissman then use a ruler along those edges so both sides match up perfectly when done!
Step 2:
The next step is to carve the small details. You will use the file for this task, but you must be careful not to apply too much pressure. If you apply too much pressure, then your soapstone carving kit could break!
Take your time while carving the small details to make sure they look just right.
Carve the small details with the File
Once the soapstone has been carved, use the file to carve in the smaller details. A good rule of thumb is to use the grain of the stone, rather than against it. If you push too hard with your carving tool, you can easily break through to another layer of stone and ruin your intricate design. The best way to carve is by using a light touch and carving shallowly into each area that needs detailed work.
Step 3:
You can use the file to carve out the details, but don't get too detailed with it. You'll want to start by carving the ears, nose, and eyes first. When you're done with those, go ahead and carve out the rest of your masterpiece (or bunny).
You should always make sure that your soapstone is dry before carving again.
Carve any other details with the file, including the bunny's nose and ears.
- Use the file to carve small details into the soapstone, such as the eyes and ears.
- Use a small amount of water to keep your carving wet throughout this process. If you run out of water, use some spit instead! It won't ruin the soapstone if you accidentally swallow some while working on it.
- Dip your finger in water and rub it over where you want to carve more detail so that there's moisture on both sides of what will be carved away next by your file (this helps prevent splintering).
-
Carve slowly and carefully in small steps using smooth strokes until everything is finished up nicely—it may take a while but don't worry about rushing through this step because there's no need for haste!
As long as you work calmly and carefully with the correct technique then there shouldn't be any mistakes made during this process even if it takes longer than expected due to how softness affects how well tools cut through material like stone or metal when compared against harder materials such as wood."
Step 4:
Once you've carved your design and sanded away any mistakes, it's time to smooth out the soapstone. You can do this by rubbing it with fine-grain sandpaper.
Once your design has been smoothed out and is ready for use, all that's left is to finish up!
TIP:- If you're having a hard time carving a detail, you can use warm water to make the soapstone more pliable, but be sure to allow it to dry completely before carving again.
Once you're done carving, use the sandpaper to smooth out any rough edges. You can also use sandpaper to remove mistakes. If you're having a hard time carving a detail, you can use warm water to make the soapstone more pliable, but be sure to allow it to dry completely before carving again.
Conclusion
Now that you have your bunny soapstone carving, it's time to get creative! You can make anything from a snowflake to a rose by following our step-by-step guide.
We recommend starting small with something easy like the little cookie-cutter shapes. And don't forget about all those Easter eggs you've been dying for as an excuse to paint!